Let’s get real here – I’m not very crafty. 100% of me wants to be crafty, but only about 5% of me is.
I make a fair attempt, but when a craft involves more than 5 steps, you can count me out {or at least, watch me destroy it slowly}
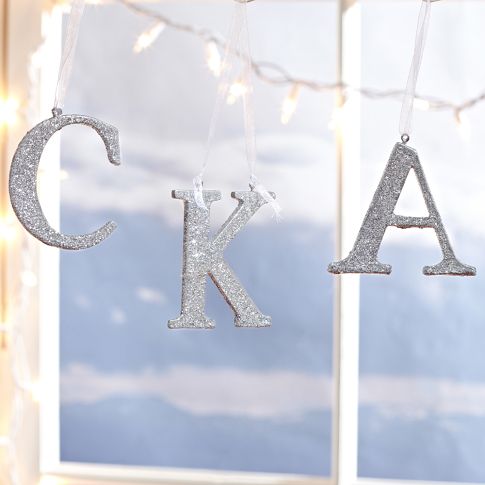
So, when I saw these fun letters {above} at a craft store, I decided to make my own spin off the Pottery Barn ornamanets below ~
{via}
Here are the dummy proof/Maya proof steps –
1) Cover your cardboard letters with glue. I used some spray clear gloss and it worked surprisingly well!
2) Cover with glitter {and if you’re me, this involves covering your entire kitchen with glitter too}
3) Let is dry and then cover it with clear gloss again – and then dry again
4) Puncture some hold in the top of the letters with a sharp pointy object that’s laying 5 feet away from you – I used a pen since I’m real fancy 🙂
5) Stick ribbon through the hole {with the help of a trusty tweezers}
6) Hang them up for everyone to see how crafty you are!!!
What easy holiday crafts are your favorite right now?


These are so cute! I'd be worried there would be glitter everywhere, although that's not a terribly bad thing 🙂
So pretty!
well done dear! 🙂
-wHiT
What a beautiful DIY! Thanks for the idea. I love being crafty but sadly don't have much time to do it.
xo Jenny
http://www.crazystylelove.com
Adorable. Absolutely, absolutely adorable. And I loved your "Maya proof" steps. It's good to know I'm not the only one who loves easy step by steps. 😉
I need "Maya proof" steps for every craft project…and recipe too 🙂
Love these! They turned out great!
Fizz and Frosting
adorable and so easy!
http://coffeebeansandbobbypins.blogspot.com/
I'm pretty sure that "cover your entire kitchen in glitter" is a bona fide step itself! haha 🙂
True fact! I'm still finding glitter around the house, oops!
im not crafty either – but this is a great idea for anyone!
chelsie | mossypants.com
Love this!
super cute, they turned out great!
xx
Staci
http://www.leatherandleops.com/
I have been wanting to make a glittered marry christmas sign. You are inspiring me. Love how your letters turned out.
This is so cute! I'm actually making letters like this for everyone in my family (shhh don't tell). I bought wood letters though, so I've been using acrylic paint and glitter paint which isn't as simple as this! Your letters came out great, I think you underestimate your craftiness 😉
Stephanie
That's such a cute idea Steph! You're going to have to post pictures after you give them to friends/family 🙂
Hahaha thanks for the dummy proof steps. I'm pretty "slow" when it comes to DIY's! Looks fab! xoox
Those are so fun. I love this DIY
XO,
Zhanna
http://www.lifeandbows.com
i love these glittery letters!!!!
http://www.trendinginfashion.blogspot.com
I LOVE those! SO easy and fabulous!
Amanda
It's an Easy Life
love this!! they're so pretty!! haha and pointy thing – you're hilarious! i am totally doing this next year!
Very pretty, Mia! You did a beautiful job!!! Loving the foolproof instructions…too cute 🙂 XO Brynn
So pretty! Adds such a nice touch to a room:)
Love this! I wish I had time to try it myself! Great blog!
sarahjsee.blogspot.com
Such a great idea! I was just looking at those ornaments to be present toppers but this may be more cost effective and I could make the glitter more personalized for each present! Love your blog!
xoxo,
Laura
http://miss-beanie.blogspot.com
Great idea! I love using letters in my decor. These are fab!
These turned out so cute! LOVE a good monogram and LOVE a whole lotta glitter!
Such a wonderful idea! Yesterday I told my husband I feel like pouring glitter over everything, which scared him a little. 🙂 I am still tempted to glue it to a few pine cones and plastic toys to decorate the room with. x
Well these are simply amazing Maya! I would love to try making these!
xo jen
So cute! I was just at TJ Maxx today looking for letters similar to this with my and my husbands initials… I should just make them! Great DIY! 🙂
For sure! And they are super easy – if I can do it you definitely can 🙂